How to Use a Polaroid Photo Printer Well
A phone holds thousands of images you may never see again. A small print changes the equation: it gets passed across the table, clipped to a studio wall, tucked into a birthday card, or kept inside a notebook. To use a Polaroid photo printer well is to treat the image as an object, not just another file.
That is the appeal of a pocket-sized Polaroid printer. It preserves the freedom of shooting on your phone while bringing back the patience, texture, and little imperfections that make instant photography feel personal. The process is simple, but the best results come from making a few intentional choices before you press Print.
Start With the Right Polaroid Hi Print Printer and Film
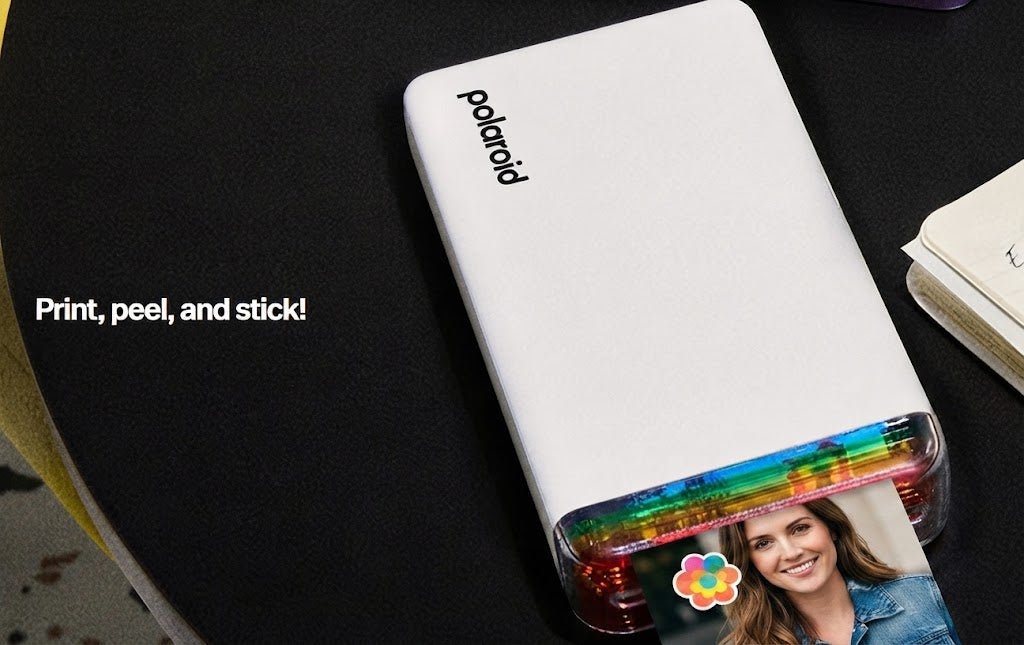
Polaroid printers are designed for different kinds of creative routines. A compact model such as the Polaroid Hi-Print is built for fast, polished 2x3-inch prints from a phone. Its dye-sublimation process produces photos with a protective finish and more controlled color than classic instant film. It is a natural fit for travel journals, gifts, party prints, and clean little displays.
The Polaroid Lab takes a different route. Rather than printing a digital file directly, it exposes images from your phone onto full-size Polaroid i-Type film. The result is closer to the familiar instant-photo experience: larger, framed, less predictable, and full of analog character. It asks more of the image and the lighting, but that is part of its appeal.
Choose based on the object you want to make. Hi-Print suits crisp, portable keepsakes. The Lab makes sense when you want a real film print with the scale and visual language of a classic Polaroid. Neither is a replacement for the other. One is immediate and graphic; the other is deliberately nostalgic.
Before your first session, charge the printer fully, install the correct paper cartridge or film pack, and download the official Polaroid app. Keep spare paper or film somewhere cool and dry. Heat, humidity, and a loose cartridge at the bottom of a bag are not ideal conditions for materials made to create small, lasting objects.
How to Use a Polaroid Pocket Printer From Your Phone
Pairing is typically handled through Bluetooth in the hi print app for Hi-Print setup and printing, or the Polaroid app for other compatible devices. Turn on the printer, open the app, select your device, and allow the requested permissions to access your photo library on your phone or iphone. Once connected, choose an image and use the app's crop tools to match the printer's aspect ratio so you do not lose important details before printing.
This last step matters more than it seems. Phone photos are usually made in a tall or wide rectangle, while instant-print formats have their own proportions. A rushed crop can cut off a hand, move a face too close to the edge, or leave the subject feeling crowded. Give the frame a moment. The strongest print often begins with what you decide not to include.
For Hi-Print, the app will guide the image through its printing passes. The app also gives you more control if you want to review a job, retry it, or cancel it, which adds useful print management control. Leave the printer on a stable surface and do not pull the paper while it moves in and out. The layered color process takes a little time, and interfering with it can damage the print or cause a paper jam.
For Polaroid Lab prints, follow the app's calibration instructions and place the phone face down on the printer as directed, since to use the polaroid well for analog film output, that calibration matters. Once the photo ejects, shield it from bright light while it develops. Avoid shaking it. That familiar gesture is more movie mythology than useful technique, and it can interfere with an even development process.
Edit for Print Quality, Not the Screen
A phone display is bright, saturated, and forgiving. A physical print has a smaller surface and a different relationship with light, and editing for print can improve vibrancy and detail compared with how the image looks on screen. Instant film also tends to print darker than images appear on a phone screen, so edits that look dramatic on screen can become muddy, overly sharp, or strangely flat once printed. That print-focused editing is part of the craft, not just correction, and it can turn a simple image into something closer to art.
Start with a clean original image whenever possible. Photos captured in proper lighting, with high-resolution files, clear separation between subject and background, and one obvious point of focus tend to translate best. Choose high-quality, high-contrast images as your starting point, since bright colors and good contrast usually reproduce better on instant film than dull, low-contrast shots, and careful edits can help turn a strong image into a more professional-looking print. A portrait near a window, a bright street scene, a colorful meal, or a graphic building facade can all work beautifully.
Lift shadows slightly if details are disappearing into black. Pull down overly bright highlights if a white shirt, sky, or lamp is losing texture, and adjust exposure with print output in mind rather than screen brightness alone. Be restrained with saturation. Small boosts to brightness, contrast, and saturation can help, but heavy filters should be avoided because they often erase detail, so experiment with small edits instead. A little warmth or contrast can give an image presence; too much can make skin tones and subtle surfaces look artificial. If you edit outside the app on a computer or phone, preparing files at around 300 DPI can help print quality, especially for Polaroid Lab output.
With a Polaroid Lab, embrace the fact that the output is film. Small shifts in exposure, color, and detail are normal. Printing digital photos onto analog instant film also requires small adjustments because film absorbs light differently. If the image feels a touch softer or moodier than the original phone photo, it may be doing exactly what you chose film for.
Let the Border Do Some Work
The white frame is part of the composition, not empty space. For a more balanced result, avoid placing important details right against the bottom edge. A little room around a subject, with equal breathing room when possible, often looks more intentional once the print has its border and frame design, and the crop should still fill the frame cleanly without crowding important details.
If you are making several prints for a wall, album, or event table, use a shared visual idea: similar color, a consistent crop, a series of close-up details, or a single day told in six frames. Consistent templates or a shared style can also help the set feel more cohesive, and if you try new templates, check the sizing before printing a full set. A collection feels more considered when the images speak to one another.
Print Moments Worth Keeping
Not every good phone photo needs a physical version. The limited nature of paper and film is a useful filter, and that restraint encourages more thoughtful composition because not every image needs to become one of your printed shots. Print the image that gains something from being held.
A candid shot from dinner becomes a thank-you note when slipped into an envelope. A photo of a new apartment can live on a desk while the space changes around it. A concert image, a weekend trip, a dog asleep in a patch of sun, or a friend caught mid-laugh can carry more weight as a print than as a thumbnail in a camera roll, since physical prints deepen emotional connections to memories and can trigger smiles and nostalgia in a way scrolling past the same image on a screen often does.
Polaroid printers also work well at gatherings because they let you print memories on the spot and turn the act of sharing into part of the event. Printed photos can be shared instantly, so friends can watch the print come out and react together, then post them on a board or pass them around right away, which is part of the fun. Set out a small tray of pens, a guest book, and a clear place for finished prints. People do not need to be photographers to enjoy a print they can sign, trade, or take home, especially with the people who matter most, whether that means putting one into a guest book, collage, or display.
For gifts, pair a small run of prints with a simple idea rather than a random stack. Try five images from a shared trip, a set of portraits made over a year, or a visual note of favorite corners of a city, then add a little creativity in how you arrange them or personalize a caption, using the app’s creative features for a more polished presentation. The format is small, but the gesture does not feel small, and it helps to grab extra paper or supplies before a party or trip if you expect to print a lot.
Handle Prints Like the Keepsakes They Are
Fresh prints deserve a little care. With Hi-Print photos, allow the process to finish completely before handling the print too much, and hold prints by the edges to avoid degrading colors. The finished image has a protective layer, but it will still look best when stored away from sustained direct sun, excessive heat, and moisture.
With instant film made through the Polaroid Lab, development takes longer and continues after ejection. Keep the print facedown or covered during its earliest stage, then let it settle in a dry, temperate place. Do not judge the final color in the first few minutes. Film has its own timetable.
For long-term storage, use an album, archival box, archival sleeves, or a display area away from direct sunlight, since sleeves help protect prints from pollutants. Adhesive corners, clips, and washi tape make it easy to rotate prints without permanently committing them to a wall. Store finished prints away from direct sunlight and humidity to reduce fading. If you write on the border, use a pen that will not smudge and keep the note brief: a date, a place, a name, or one line worth remembering, and label boxes or albums with dates for easy identification. With proper storage, prints can last for decades, so check them occasionally for early signs of damage.
Common Problems, Better Fixes
If a print looks too dark, start by brightening the original photo slightly rather than raising every setting at once. If streaks or dust spots keep appearing, clean the printer head. If faces look overly warm or colors feel loud, reduce saturation and temperature in small increments. Print one test image before committing to a whole set, and film development is more reliable when the environment stays between 55°F and 82°F (13°C and 28°C).
If the printer will not connect, confirm Bluetooth is active, close and reopen the app, and make sure the printer has enough battery. Removing old Bluetooth pairings can also help when a phone keeps trying to connect to a previous device. If the phone screen used for Polaroid Lab calibration looks smudged, clean displays with a soft microfiber cloth before printing. For paper-feed issues, check that you are using the correct cartridge and that it is seated cleanly. Never force paper back into the printer.
The more subtle problem is printing too many versions of the same image. Instant printing is most satisfying when it remains selective. Make a test when you are learning a new crop or edit, so you can review the result before committing to more copies, then keep the final print as the one that earns its place. Testing first can save money by reducing wasted reprints.
A Polaroid photo printer is not about reproducing every image to look perfect. It is about choosing a few images that deserve a life beyond the feed - on your wall, in a friend's hand, or inside a book you will open years from now.